Having recently learnt the basics of patchwork and quilting I wanted to take on a small, simple project using these skills before working my way up to tackling making a quilt. For a look at my first attempts at quilting see our blog post on What is quilting? A patchwork and appliqué cushion seemed like […]
Add To CartA simple, quick project using patchwork and appliqué.
00Having recently learnt the basics of patchwork and quilting I wanted to take on a small, simple project using these skills before working my way up to tackling making a quilt. For a look at my first attempts at quilting see our blog post on What is quilting? A patchwork and appliqué cushion seemed like the perfect answer. I drew a simple pattern of a patchwork border and left space in the middle for some appliqué. The first challenge was choosing the material. Too many choices! What are the best colours to go together? The second challenge was what to use as the appliqué. This was meant to be a simple quick project so I chose a simple pattern of two hearts. After measuring the cushion pad and allowing for seam allowances I cut out the material using a rotary cutter. Rotary cutters are great for shapes with straight edges and so much quicker than scissors. For an introduction to using a rotary cutter click here. With all the pieces cut out I prepared the back of the cushion. This is a simple envelope cushion so I had cut the back wider than the cushion pad so I could cut it in half to make the envelope overlap. The edges were turned over and sewn into place and the two pieces put aside to use later. The next step was to attach the hearts to the front using Bondaweb. Being more than capable of attaching the wrong side of the appliqué to the cushion I always follow our simple tutorial on this to get it right each time! Next each patchwork strips was attached to the appliquéd centrepiece to make one large front piece for the cushion. Then attach the two back pieces, insert the cushion pad and the cushion is finished. Simple and quick to make! There is no excuse get revamping your cushions now! The Finished Cushion...
Having recently learnt the basics of patchwork and quilting I wanted to take on a small, simple project using these skills before working my way up to tackling making a quilt. For a look  at my first attempts at quilting see our blog post on What is quilting?
A patchwork and appliqué cushion seemed like the perfect answer. I drew a simple pattern of a patchwork border and left space in the middle for some  appliqué.
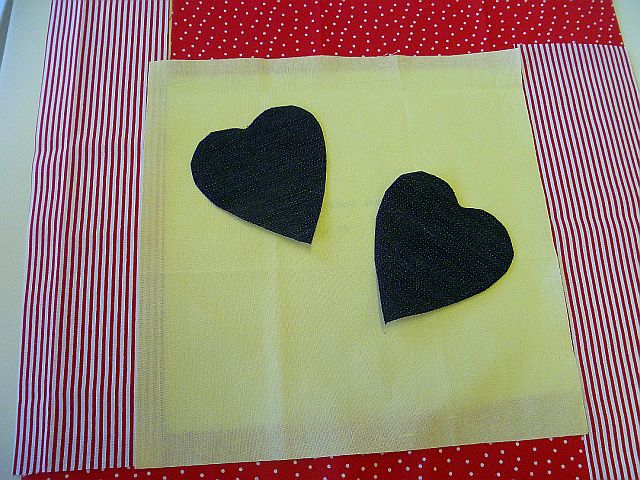
The first challenge was choosing the material. Too many choices! What are the best colours to go together? The second challenge was what to use as the appliqué. This was meant to be a simple quick project so I chose a simple pattern of two hearts.
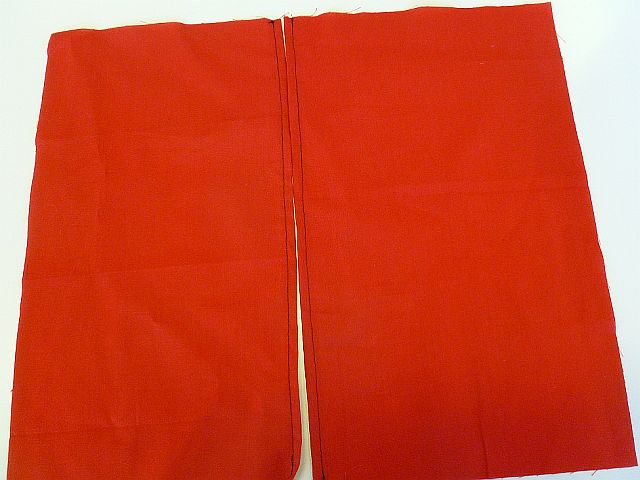
After measuring the cushion pad and allowing for seam allowances I cut out the material using a rotary cutter. Rotary cutters are great for shapes with straight edges and so much quicker than scissors. For an introduction to using a rotary cutter click here.
 With all the pieces cut out I prepared the back of the cushion. This is a simple envelope cushion so I had cut the back wider than the cushion pad so I could cut it in half to make the envelope overlap. The edges were turned over and sewn into place and the two pieces put aside to use later.
The next step was to attach the hearts to the front using Bondaweb. Being more than capable of attaching the wrong side of the appliqué to the cushion I  always follow our simple tutorial on this to get it right each time!
Next each patchwork strips was attached to the appliquéd centrepiece to make one large front piece for the cushion. Then attach the two back pieces, insert the cushion pad and the cushion is finished.
Simple and quick to make! There is no excuse get revamping your cushions now!
The Finished Cushion

Related Products
New Sewing Class – Making Childrens Clothes
New Sewing Class – Making Childrens Clothes
00We are excited to be adding a new sewing class early next year – Making Children’s Clothes. This class is suitable for complete beginners, those wanting a refresher and anyone wanting to take their first steps in dressmaking. This class is suitable for complete beginners, it can be worn in the winter with tights and a jumper underneath or on its own in the summer. The class runs on a Tuesday morning from 10.30am-1.30pm to fit in with school hours. Come along and learn how to make your own kid’s clothes. For more details click...
Make a Dress – Dressmaking Class. The sample dress is ready!
Make a Dress – Dressmaking Class. The sample dress is ready!
00Tracey has been busy refining the pattern and instructions and making up a sample for our dressmaking class next week. The dress is a classic design that will suit many figure shapes. It has a crossover infront of the bust and pleats to allow you to shape it depending on how full you want it. Darts in the back help the shaping and the skirt length can be adjusted to above and below the knee. Sleeves can be short or three quarter length so it really is a flexible pattern that you can make your own. We have made the sample up in a plain polycotton but it will look lovely in all sorts of fabrics. We still have a couple of places left on the class on Saturday 24 November and we are running the class again on Saturday 2 February 2013. To book your place click...
Lets Get Crafting and Craftseller Mention Crafts Bee!
Lets Get Crafting and Craftseller Mention Crafts Bee!
00Its been a busy press month! Thanks to Lets Get Crafting http://www.letsgetcrafting.com/ and to Craftseller Magazine for mentioning our Crochet Classes and Sewing Classes this month....
Dressmaking Classes for Everyone
Dressmaking Classes for Everyone
00Dressmaking Classes and Courses at Crafts Bee We have a range of dressmaking courses at Crafts Bee. We even have one for complete newcomers to sewing! If you have never sewn before but want to have a go try our Make an A Line Skirt class. This will include a short introduction to using a sewing machine and then we will help you to make your skirt. Not a bad days work for a beginner! If you have basic sewing skills dressmaking is a great next step with your sewing. Find out how to make clothes that no one else has, are well made and fitted to you. We have separate classes for making a dress, making a skirt or making a pair of trousers. These classes will show you how a garment is put together and how to finish hems and seams, how to insert zips and how to deal with darts. Our patterns fit sizes from 6 to 22. If you want to join one of these classes but have no sewing experience just attend our Learn to Sew Class first. Coming soon – Making kids clothes. Do you want to try designing your own clothes or are you fed up trying to get clothes to fit you properly? Our pattern cutting classes are your solution. Using your own measurements you will make a pattern to fit you and then make this up in cotton to test its fit on you. Take your pattern home and make clothes using your pattern. Choose from Pattern Cutting Trousers or Pattern Cutting Skirts. Coming soon Pattern Cutting Bodice. Dressmaking classes, dressmaking classes London, dressmaking classes kent, dressmaking courses, dressmaking courses london, dressmaking courses kent, learn to sew, learn to sew classes kent, learn to sew classes london, dressmaking classes south london, dressmaking courses south london, pattern cutting classes, pattern cutting classes london, pattern cutting classes kent, pattern cutting classes south london,pattern cutting courses london, pattern cutting courses kent, pattern cutting courses south...
Trusted Provider by Hotcourses!

 We are delighted to have been awarded Trusted Provider status by Hotcourses. They tell us they have only awarded this to 50 providers out of the hundreds they deal with so it is a real honour!
